March 2011

How-To Prepare a scene for LightNet:Cloud

For an onsite scene, the content information is simply a path, you do not need to package and zip the content for onsite rendering. However, this does mean that all onsite PCs must have access to this path. The easiest way to accomplish this is to have a mapped network drive to the content's location. Full network paths with also work. So \\FileServer\CDrive\MyContent will work or Z:\MyContent will work as long as Z:\ is mapped to \\FileServer\CDrive

How-To Setup LightNet: Cloud for the first time

Want to get up and running with LightNet: Cloud? First you'll need a couple of things:

Then follow a few steps:

HOW-TOs

Here are several HOW-TOs for using LightNet: Cloud.

Settings

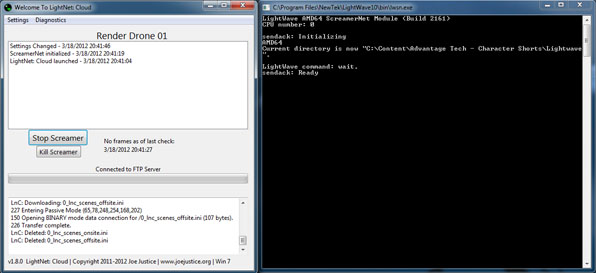
Run LightNet-Cloud.exe  and click "Settings -> "Change Settings" (LightNet-Watcher.exe uses the same configuration file, but all of the settings are controlled by LightNet-Cloud.exe, so run it first). Here you'll see four tabs:

General Settings

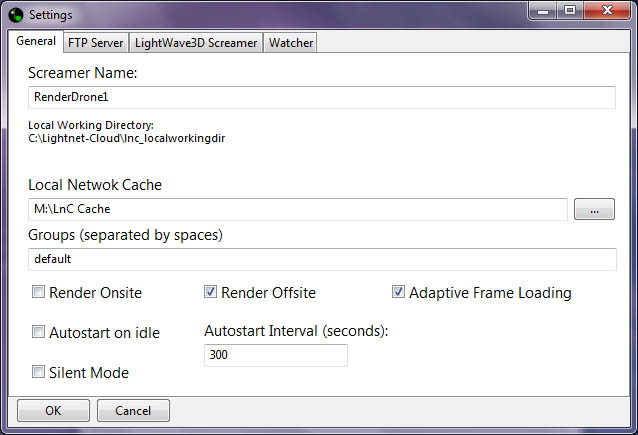
You need to give your screamer a name, this is used to generate logs. Be sure it has a unique name to prevent confusion if you need to review logs.

Change Log

v1.8 (Coming Soon)

Overall improvements of file handling:

About LightNet: Cloud

LightNet: Watcher interface

The traditional idea of a network render controller involves having multiple PCs on a local network... Each PC then receives instructions to load and render frames.

LightNet: Cloud is a FTP server based networking rendering controller for Lightwave3D.

LightWave3D

LightWave3D is a fantastic 3D computer animation suite created by NewTek. It's the software I use for all 3D graphics, animation and forensic animation. You can read all about it at NewTek's LightWave website.

Some handy links:

LightNet: Cloud

LightNet: Cloud

Pages